


Choosing a Fluorescent Antibody Conjugation Kit

Fluorescent Antibody Conjugation Kits: Selection, Labeling, and Validation
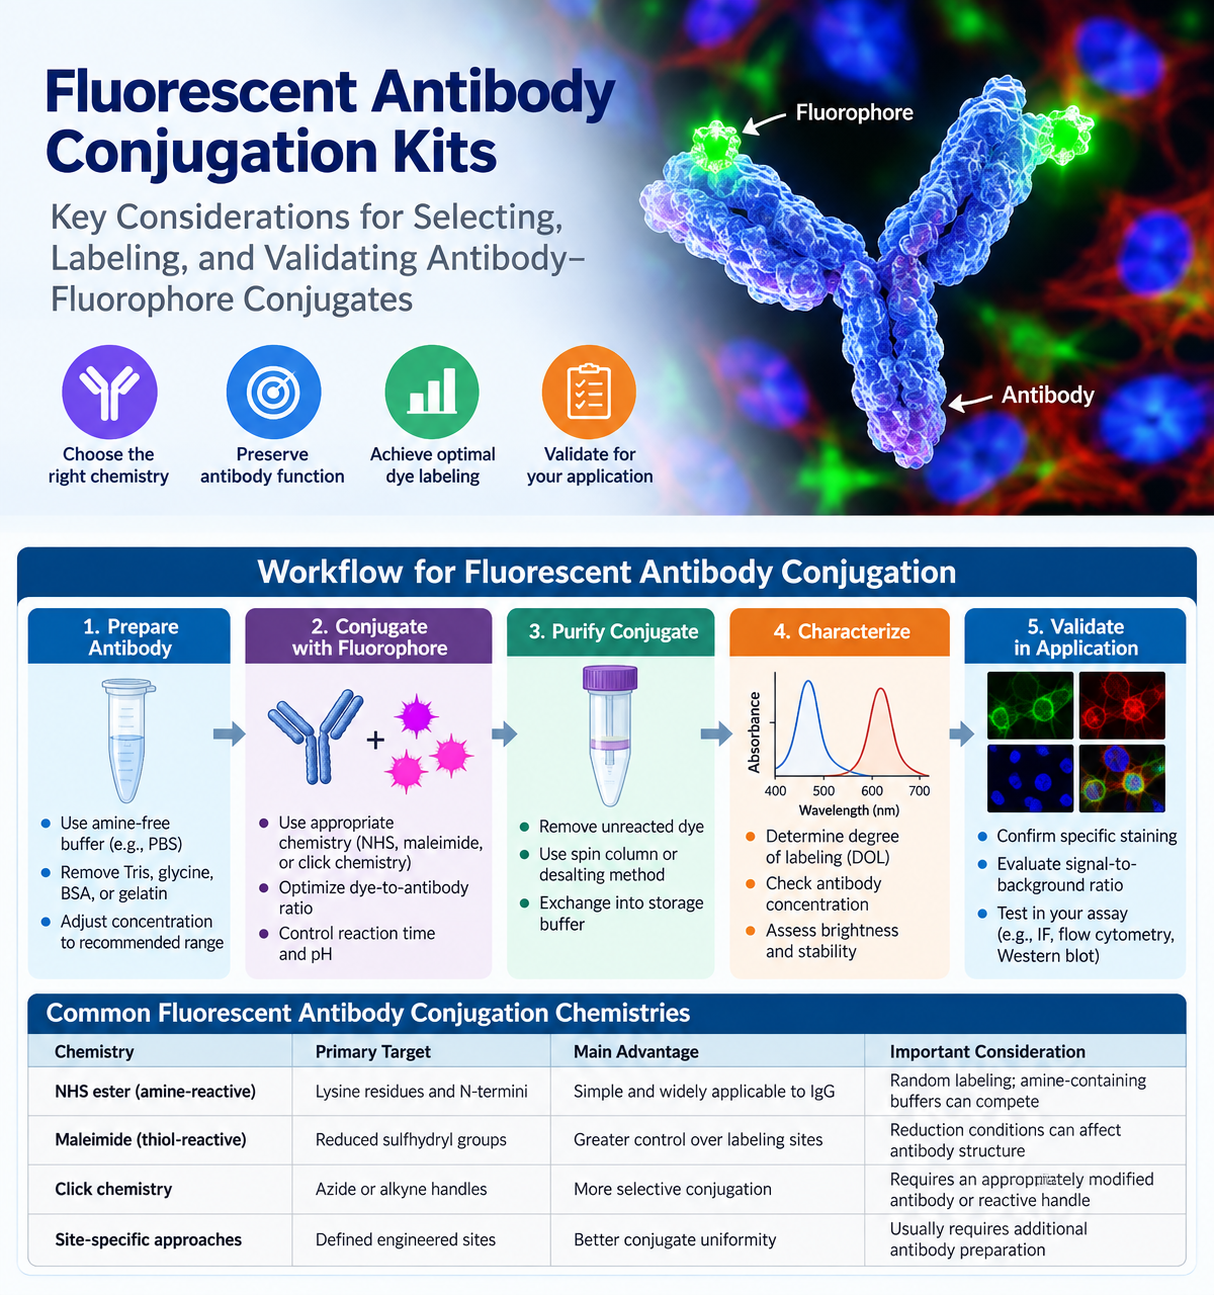
A fluorescent antibody conjugation kit can save time when a validated primary antibody is available but the required fluorophore, species combination, or multiplexing configuration is not. Direct antibody labeling also gives researchers greater control over fluorophore selection and labeling conditions than relying solely on commercially available pre-conjugated antibodies.
That flexibility introduces variables that can affect antigen binding, background fluorescence, signal intensity, conjugate stability, and lot-to-lot consistency. Successful fluorescent antibody conjugation therefore requires more than simply choosing a dye.
For research workflows such as flow cytometry, immunofluorescence microscopy, fluorescent Western blotting, ELISA development, multiplex imaging, and cell-based assays, antibody composition, conjugation chemistry, fluorophore properties, purification, and downstream assay conditions should be evaluated together before labeling begins.
What a Fluorescent Antibody Conjugation Kit Does
A fluorescent antibody conjugation kit provides the reactive fluorophore and supporting reagents needed to covalently attach a fluorescent label to an antibody. Depending on the product and chemistry, a kit may include an activated dye, reaction buffer, purification material or spin columns, and instructions for determining antibody input and reaction conditions.
The objective is to produce an antibody-fluorophore conjugate with sufficient fluorescence while preserving antibody specificity and functional performance. The degree of labeling should be high enough to generate useful signal but not so high that dye loading interferes with antigen recognition, promotes aggregation, or increases nonspecific background.
Commercial antibody labeling approaches commonly use several types of conjugation chemistry.
NHS ester dyes react primarily with accessible primary amines, including lysine side chains and protein N-termini.
Maleimide dyes react with sulfhydryl groups and can be used with naturally accessible or deliberately generated thiols.
Click-chemistry approaches use complementary reactive groups, such as azide and alkyne functionalities, and can provide more selective labeling when the antibody has been appropriately modified.
For many conventional IgG labeling projects, amine-reactive chemistry provides a straightforward starting point. However, because lysine residues occur at multiple positions throughout an antibody, labeling is generally heterogeneous and modification near functionally important regions can potentially affect antigen binding. More controlled or site-specific approaches may therefore be preferable when conjugate uniformity or preservation of activity is especially important.
Selecting a Fluorescent Antibody Conjugation Kit
Start with the intended assay platform.
A fluorophore that performs well in fluorescence microscopy may not be optimal for flow cytometry, where laser lines, detector configurations, compensation, and spectral spillover must be considered. Fluorescent Western blotting may favor dyes with low membrane background and suitable imaging wavelengths, while tissue imaging may require fluorophores selected around tissue autofluorescence and available filter sets.
For additional considerations related to fluorescent Western blot detection, see Enhancing Your Western Blot with Fluorescent Staining: Tips for Better Visualization and Analysis.
Brightness alone should not determine fluorophore selection. Consider:
- Excitation and emission maxima
- Instrument laser and detector compatibility
- Photostability
- Water solubility
- Spectral overlap
- Sample autofluorescence
- Compatibility with fixation and permeabilization conditions
- Other fluorescent labels already present in the experiment
For multiplex assays, dyes should provide sufficient spectral separation within the complete experimental system, including fluorescent proteins, nuclear stains, viability dyes, and other antibody conjugates.
Check the Starting Antibody Formulation
The starting antibody must be compatible with the selected conjugation chemistry.
For NHS ester labeling, buffers containing primary amines—particularly Tris or glycine—can compete with antibody amines for the reactive dye and reduce labeling efficiency. Carrier proteins such as bovine serum albumin (BSA) or gelatin can also become labeled, complicating purification and interpretation.
Before beginning conjugation, review:
- Antibody concentration
- Total antibody mass available
- Buffer composition
- Carrier proteins
- Stabilizers and preservatives
- Glycerol concentration
- Antibody format
- Recommended storage conditions
If buffer exchange is required, select a method that minimizes antibody loss and maintains appropriate pH and protein stability.
Sodium azide is not universally incompatible with fluorescent antibody labeling, but its presence should be evaluated against the specific conjugation chemistry and intended downstream application rather than assumed to be acceptable for every workflow.
Match Conjugation Chemistry to the Antibody and Application
The major conjugation strategies differ in their reactive targets and practical advantages.
| Conjugation Chemistry | Primary Target | Main Advantage | Important Consideration |
|---|---|---|---|
| NHS ester / amine-reactive | Primary amines on lysine residues and N-termini | Simple and widely applicable to IgG and many proteins | Random labeling; amine-containing buffers such as Tris or glycine can compete |
| Maleimide / thiol-reactive | Accessible sulfhydryl groups | Can provide greater control over labeling sites | Reduction conditions may affect antibody structure; reducing agents should generally be removed before labeling |
| Click chemistry | Complementary reactive handles such as azide and alkyne groups | More selective conjugation | Requires an appropriately modified antibody or compatible reactive handle |
| Site-specific approaches | Defined engineered or introduced sites | Can improve conjugate uniformity | Usually requires additional antibody preparation and method optimization |
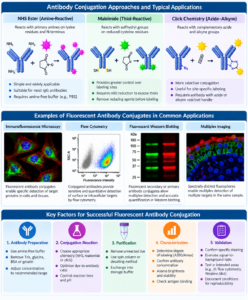
Antibody conjugation approaches including NHS ester, maleimide, and click chemistry for fluorescent antibody labeling
Amine-Reactive Labeling
Standard whole IgG antibodies are commonly compatible with amine-reactive labeling when formulated in an appropriate amine-free buffer.
The amount of reactive dye relative to antibody influences the resulting degree of labeling. Increasing the dye-to-protein ratio can increase fluorophore incorporation, but excessive labeling can reduce antibody activity or increase nonspecific fluorescence. Manufacturer instructions should therefore be used as the starting point for determining reaction stoichiometry.
Thiol-Reactive Labeling
Thiol-reactive labeling can provide useful control over conjugation but requires careful antibody preparation.
Reducing antibody disulfides too aggressively may alter antibody structure or generate heterogeneous products. When reduction is required, optimize the conditions on a small scale and remove incompatible reducing agents before adding the maleimide-activated fluorophore.
Antibody Fragments and Recombinant Binders
Fab fragments, recombinant antibodies, nanobodies, and other small binding proteins require additional consideration because their molecular size, accessible reactive residues, and structural stability may differ substantially from conventional IgG.
When antibody material is limited or its stability is uncertain, a small pilot conjugation is preferable to committing the entire antibody stock.
A Practical Fluorescent Antibody Labeling Workflow
1. Prepare the Antibody
Read the kit-specific instructions before preparing the sample because antibody concentration, dye-to-antibody ratio, buffer composition, reaction time, and purification procedures vary among conjugation systems.
Place the antibody in the recommended reaction buffer and confirm its concentration using an appropriate protein assay.
Whenever possible, determine antibody concentration before conjugation. After labeling, fluorophore absorbance can contribute to measurements used for protein quantitation and may require correction.
2. Perform the Conjugation Reaction
Add the activated fluorophore according to the recommended molar ratio and mix gently.
Avoid unnecessary vigorous vortexing, particularly with low-concentration antibody preparations, because foaming and mechanical stress can contribute to protein aggregation.
Protect fluorescent reagents and conjugates from unnecessary light exposure and maintain the specified reaction temperature, pH, and incubation time.
Longer incubation does not necessarily produce a better conjugate. Reactive dyes can undergo hydrolysis, while excessive fluorophore incorporation can adversely affect antibody performance.
3. Remove Unreacted Fluorophore
After conjugation, remove free dye efficiently.
This is a critical step because residual unconjugated fluorophore can produce:
- Diffuse fluorescence
- Increased microscopy background
- Elevated flow cytometry background
- Misleading signal localization
- Inaccurate degree-of-labeling measurements
Size-exclusion spin columns and desalting columns are frequently used for rapid purification. Chromatography, dialysis, or ultrafiltration may also be appropriate depending on antibody quantity, molecular size, recovery requirements, and reaction volume.
4. Transfer the Conjugate Into an Appropriate Storage Buffer
Recover the purified conjugate in a buffer suitable for the antibody, fluorophore, and intended assay.
Protect the conjugate from light and avoid unnecessary freeze-thaw cycles. Storage temperature and formulation should follow the recommendations applicable to the particular antibody and fluorophore.
Evaluate Degree of Labeling
A conjugate should be assessed for both labeling efficiency and biological function.
Degree of labeling (DOL), sometimes expressed as the fluorophore-to-protein ratio, can often be estimated spectrophotometrically from absorbance at 280 nm and at the fluorophore’s absorbance maximum.
Because many fluorophores also absorb to some extent at 280 nm, the protein absorbance may require correction using a dye-specific correction factor. Follow the fluorophore manufacturer’s calculation method rather than applying a single correction factor universally.
An acceptable degree of labeling depends on:
- Fluorophore
- Antibody
- Antibody format
- Assay platform
- Required sensitivity
- Background tolerance
A higher degree of labeling does not automatically produce a better reagent. Greater fluorophore loading may increase brightness while simultaneously reducing antibody affinity, increasing aggregation, or raising nonspecific background.
For a new conjugate, comparing more than one labeling condition can help identify an appropriate balance between signal intensity and functional performance.
Validate the Conjugated Antibody in the Intended Assay
Spectrophotometric characterization alone does not establish that the conjugated antibody still functions correctly.
Functional validation should use appropriate positive and negative samples whenever possible.
Flow Cytometry
Evaluate:
- Staining index
- Positive/negative population separation
- Background fluorescence
- Antibody titration
- Spillover or spectral interactions
- Performance relative to an established reagent when available
Immunofluorescence Microscopy
Evaluate:
- Expected cellular or tissue localization
- Background staining
- Signal intensity
- Photostability
- Performance after fixation and permeabilization
- Reproducibility between preparations
Fluorescent Western Blotting
Verify target-band specificity and assess membrane background under the planned blocking, washing, and imaging conditions.
For general Western blot workflow information, see An Introduction to Western Blotting.
Multiplex Applications
In multiplex experiments, evaluate the conjugate as part of the complete panel rather than only in isolation. A fluorophore that performs well individually may introduce spectral overlap or background when combined with other labels.
Use Appropriate Experimental Controls
Controls help distinguish true target-associated fluorescence from nonspecific or instrument-related signal.
Depending on the assay, useful controls may include:
- Unstained samples
- Antigen-negative cells or tissues
- Secondary-only controls where relevant
- Fluorescence-minus-one controls for multicolor flow cytometry
- Isotype controls when scientifically justified
- Known positive samples
- Established conjugated-antibody comparators
A bright fluorescent signal without appropriate target specificity is not evidence of a successful conjugate.
Common Fluorescent Antibody Conjugation Problems
| Problem | Possible Causes | Practical Response |
|---|---|---|
| Low fluorescence | Insufficient labeling, fluorophore degradation, poor recovery, incompatible instrument configuration | Confirm instrument compatibility, determine degree of labeling, review reaction conditions and purification recovery |
| High background | Residual free dye, excessive dye loading, aggregation, nonspecific antibody binding | Improve purification, reduce labeling density, optimize antibody concentration and blocking |
| Loss of antigen recognition | Modification near binding region, over-labeling, harsh buffer exchange, excessive reduction | Reduce labeling density, modify reaction conditions, consider alternative or site-specific chemistry |
| Poor conjugate recovery | Low starting mass, adsorption, unsuitable purification device, aggregation | Review cleanup format, use suitable low-binding consumables, optimize antibody concentration |
| Variable results between preparations | Inconsistent antibody concentration, reaction stoichiometry, timing, purification, or storage | Standardize the workflow and document all reaction parameters |
In cell-based assays, Fc receptor interactions, damaged cells, and dead-cell staining can also contribute to apparent background. Related assay considerations are discussed in Choosing the Best Cell Viability Assay: A Side-by-Side Breakdown.
Documentation Improves Reproducibility
For reproducible fluorescent antibody conjugation, document:
- Antibody name and clone
- Catalog number
- Antibody lot
- Starting concentration
- Starting mass
- Buffer composition
- Fluorophore
- Fluorophore lot
- Dye-to-antibody reaction ratio
- Reaction pH
- Reaction time and temperature
- Purification method
- Recovery volume
- Final antibody concentration
- Degree of labeling
- Storage conditions
- Functional validation results
These records become especially valuable when a conjugate is incorporated into a recurring flow cytometry panel, microscopy workflow, Western blot assay, or long-term assay-development program.
Research-Use Considerations
Fluorescent antibody conjugation kits are valuable tools for adapting existing antibodies to specific research workflows, but the resulting conjugate should be validated for its intended experimental application.
A research-use conjugation kit does not by itself establish clinical, diagnostic, or regulatory suitability of the resulting antibody conjugate.
When an uncommon fluorophore, limited antibody quantity, or specialized antibody format is involved, a carefully planned pilot reaction is generally preferable to labeling the entire antibody stock at once.
The most useful fluorescent antibody conjugate is not necessarily the preparation containing the greatest amount of dye. It is the conjugate that provides specific, reproducible, stable signal while preserving antibody function under the actual conditions of the intended assay.
References
- Thermo Fisher Scientific. Bioconjugation Technical Handbook. Sections covering fluorescent dye labeling reagents, amine-reactive labeling, sulfhydryl-reactive labeling, and antibody conjugation.
- Thermo Fisher Scientific. NHS-Fluorescein Antibody Labeling Kit User Guide. Guidance for antibody preparation, amine-free buffer requirements, labeling reaction, purification, and degree-of-labeling considerations.
- Thermo Fisher Scientific. A Guide to Making Your Own Fluorescent Bioconjugate. Overview of amine-, thiol-, and other reactive fluorescent labeling strategies.
- Thermo Fisher Scientific. Alexa Fluor and Alexa Fluor Plus Reactive Esters — User Guide. Guidance for amine-reactive fluorescent labeling and characterization.
For Research Use Only.